Introduction
If you’re looking for a simple project to introduce yourself to the world of home power then you can’t find a project much easier than converting a common desk lamp to use 12V DC battery power as opposed to 120V AC from a wall socket.
I chose this project because I can recharge the batteries from my solar panels and know I’m using green energy. Some use cases for this project are to take the lamp someplace where AC power isn’t available, such as camping, or where AC is inconvenient to access, like an attic (think flashlight with a sitting base).
Step 0: Unplug the lamp!!
I’m not a safety expert but I do use good common sense when working on electronic projects. Especially when it involves 120V AC! You too should use common sense. Don’t work on the project while it is plugged into the wall!
Step 1: Select a lamp
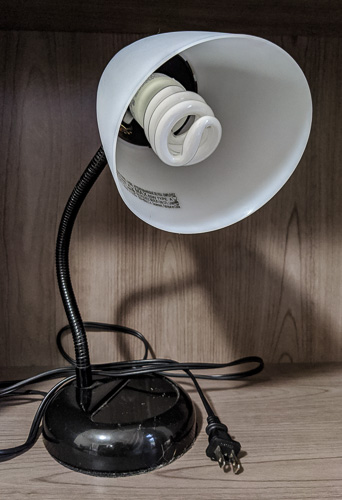
I selected a desk lap that I’ve had for several years. It was beginning to show its age so rather than retire it I decided to try and give it some new life. I liked this lamp as the design was simple. A single twist on/off switch at the top of the lamp as opposed to a fancier 3-way switch. A quick read of the warning label let me know the design could handle a simple LED bulb.
Step 2: Select the bulb
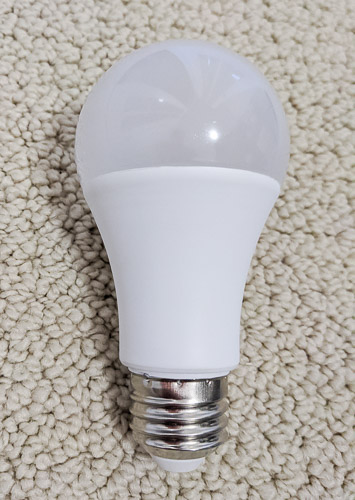
I want a bulb as bright as the CFL I am replacing so I searched the internet for a powerful 12V bulb. I found these 7W models on Amazon. So far I’ve had no issue with the operation of these bulbs. They lack labeling of any kind so I resorted to labeling them with a sharpie otherwise I’m liable to screw them in to a 120V which will ruin them instantly.
Some notes about bulb selection. 7W is the brightest 12V bulb I could find at what I thought was a reasonable price point. 7W is a lot of power and these bulbs are bright. The downside to this is that they draw a lot of current and will drain small batteries quickly. My initial estimates say maybe 2 hours of bright light from my battery pack.
Skip this next section if you don’t like math. 7Wh @ 12V = 583mAh. For my power source I chose to use 8x AA 1.2V NiMH batteries @ 1900mAH. The batteries will produce around 1.3V each. 8x 1.3V = 10.4V so not a full 12V. Time to redo the math, 7W @10.4V = 673mA. The wire in the small alligator clips I’m using will probably get hot quickly. I guess that the current draw could go as high as 750mA so 20 AWG wire would provide some safety margin.
Choose your bulb size with both your use and power source in mind. A powerful bulb will drain batteries quickly but shine more brightly than a lower wattage bulb. For my use case the batteries may last 2 hours if the voltage remains constant, which it won’t. This will also drain the batteries completely which isn’t good for them. I’ll report my actual results down below.
Step 3: Remove the base
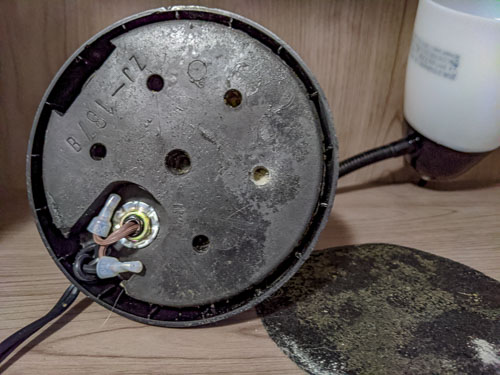
In my case the base was a felt and plastic pad with some sticky stuff on one side. As I mentioned, the lamp was old so the pad pealed off without much resistance.
Step 4: Untwist the wires
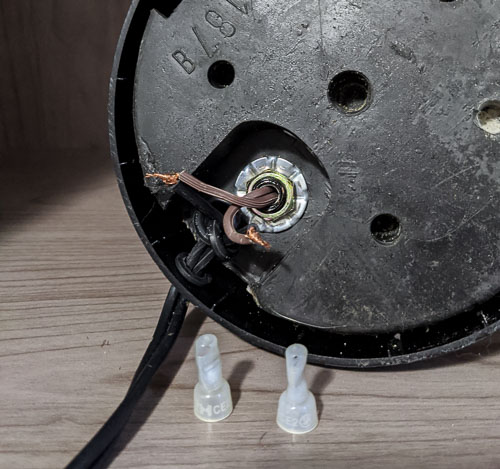
I found a pair of simple clear plastic wire connectors under the pad which I untwisted with my fingers exposing the bare copper wires.
Step 5: Remove the 120V power cord
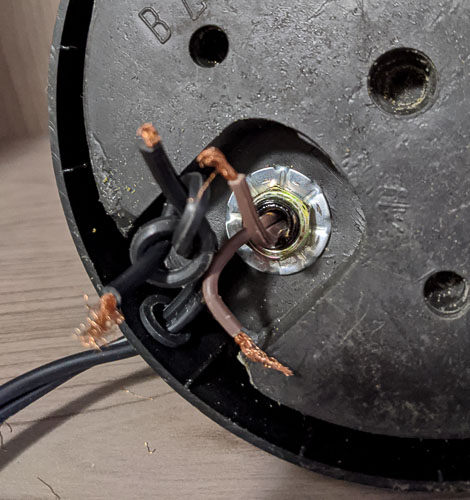
Removing the power cord, black in my case was as simple as untwisting the knot and feeding the cord back through the hole in the base.
Step 6: Find which wire is positive (+)
As I was attaching the battery I realized that there wasn’t any clear indication which wire going up to the fixture was positive and which was negative. A quick Google search revealed that the positive wire is attached to the tip of the light bulb socket, while the negative wire is attached to the rim of the bulb socket.
With the above in mind I got my multi-meter and tested which of the wires was attached to the tip of the socket. Armed with this information I proceeded to the next step.
Step 7: Attach the battery
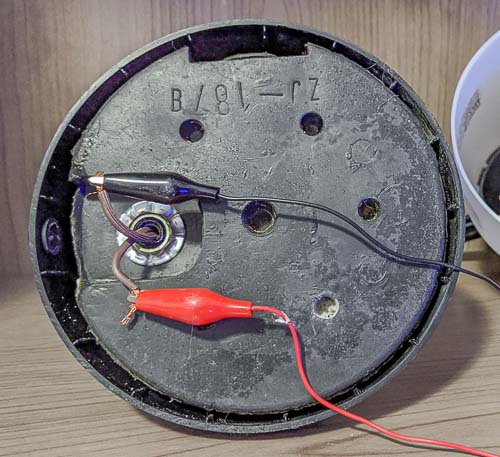
For my power source I chose to put eight (8) AA NiMH rechargeable batteries in series. I like the Panasonic Eneloop brand 1900mAh because they hold their charge much better than standard NiMH batteries.
Using simple alligator clips I attached the battery to the wires as shown being aware to attach the positive and negative to the correct wire.
Step 8: Check for mistakes
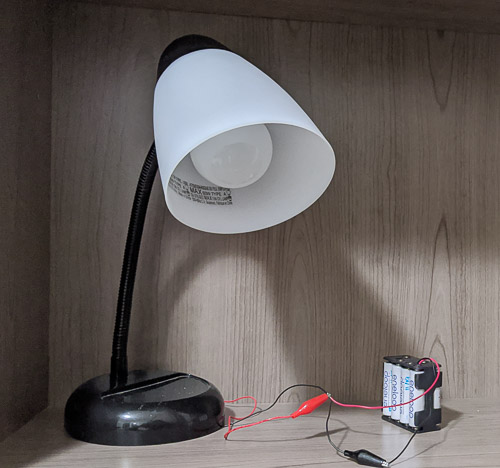
It’s always worth a final check of one’s work before turning the switch. I double checked my wiring then the moment of truth was at hand.
Step 9: Turn the switch
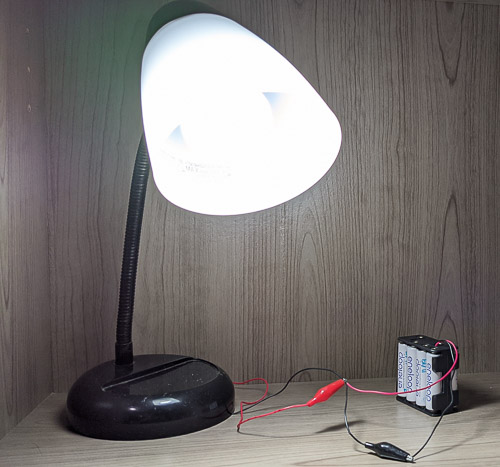
The light was almost blindingly bright when I turned it on the lamp. Given this was powered by a bunch of AA batteries it was brighter than expected.
I did some checks after leaving the lamp on for several minutes and while the wires weren’t smoking, they did get hot to the touch so before trying to put this into use in my bedroom I am going to have to upgrade to a larger size wire.
Summary
I hope these simple steps have encouraged you to try your hand at converting a simple desk lamp to use battery power.
Choosing the right bulb and power source are two simple yet critical decisions both upon which the success of your project may rest. Pair a powerful bulb with a small battery source and you may find yourself in the dark a lot sooner that you’d have expected because the battery just isn’t large enough to provide the required amount of power for the length of time desired.
Size your wire appropriately because small wires will heat up quickly and a fire can result, even from AA batteries. 7W may not sound like it draws much current at 120V. A mere 0.05mAh. Drop the voltage from 120 volts to 12 volts and the current increases ten fold (10x). .
Best of luck to you on all your projects!